
I have a thing for cakes, especially those with such exquisite designs with intricate details. It is pretty amazing to see cakes like that and it is even more amazing to see how they are designed in the process. I always admire bakers who spend so much time and efforts behind the scenes to bake beautiful cakes. I have tried my hand at baking once and it was really not easy!
Today, I have a guest writer whom I have invited to talk about how she baked my dream wedding cake! My friend, Dayah, from DessertiniSG will be sharing how she came up with the design and eventually created the cake to perfection.
I am quite impressed because I have never once tell her how I want the cake to be designed. All I did was to confirm with her my flavour (chocolate) and my wedding will be a fairytale theme. I just told her to be creative and that’s the design she came up with!

Hello everyone! This is Dayah from @dessertiniSG, guest blogging today.
Esther and I met a couple of years ago, and one of the first things she told me was “You’re going to be making my wedding cake!” when she found out about DessertiniSG. So for the last couple of years (yes, you’ve read that right. YEARS), we have been sending pictures and videos of cakes to each other and basically bouncing off ideas from flavours to colour scheme to designs.
It was only a few months to The Big Day when Esther finalised her flavour and basically left the rest to me. I knew that Esther was a Disney Princess at heart, and her favourite was Cinderella. She was hell bent on having a fairytale wedding, and could not stop gushing about how she loved the look of crystals and chandeliers.
So the design of the cake took shape around these very ideas:

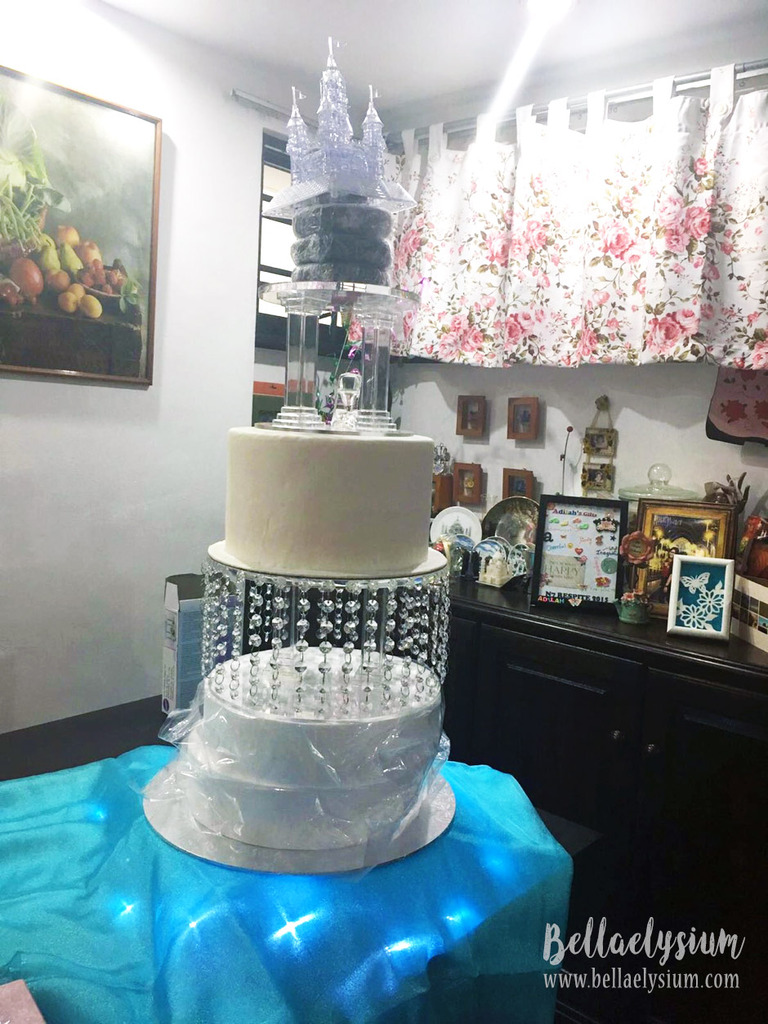
The idea was a 3 tiered white and blue cake, with edible laces to match one of her dresses. There was going to be tier with dripping crystals. There was another tier with a crystal shoe (get the Cinderella reference?) and right on top stood the crystal castle. There was going to be lace and glitter and fairy lights. Her cake was going to be a tall one, I assured her. Joyden Hall was a large hall so a small cake would be completely overpowered by the space.
Definitely tall, but still, manageable.
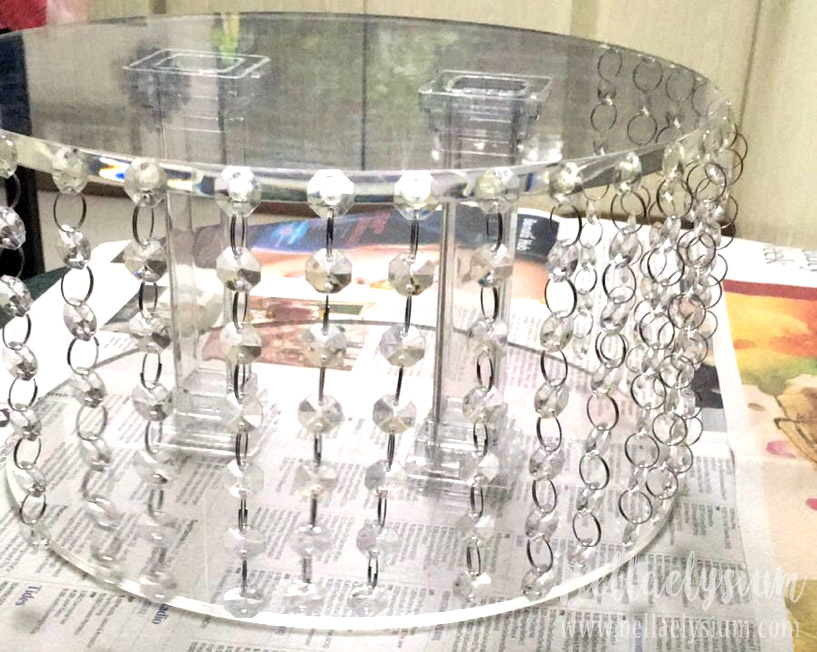
Step 1: Building the crystal cake stands in between the layers
2 plastic cake tiers were glued to the customised acrylic plates and left to dry overnight. The crystals were glued on the following day and left to dry for at least 24 hours.
Test run using dummies and frozen cakes to check the actual height of the final masterpiece:
Step 2: Creating the layers
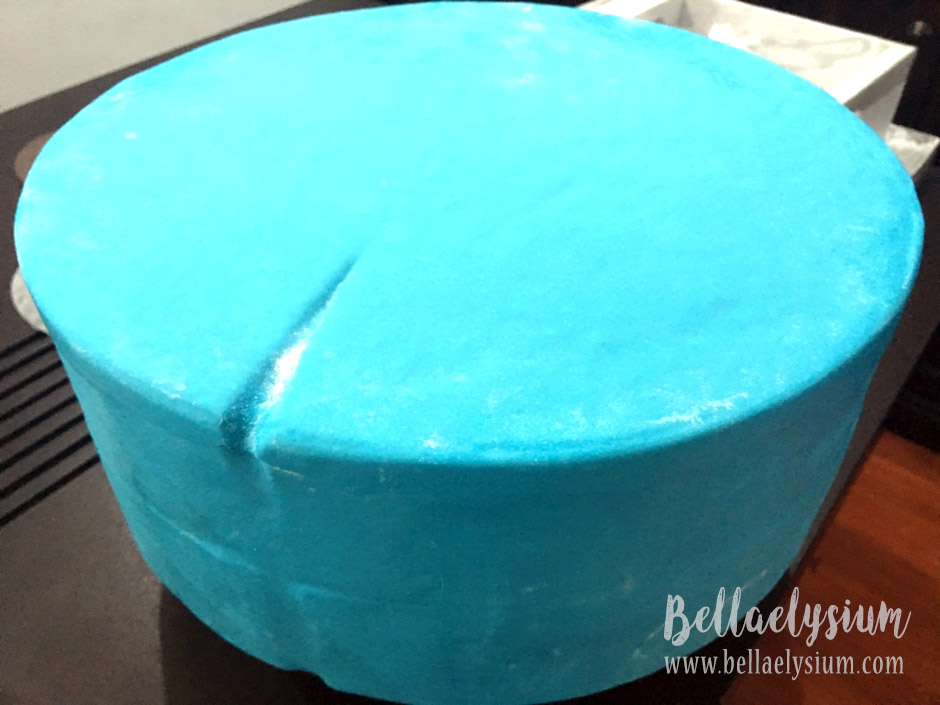
The top tier was a chocolate cake with chocolate ganache filling while the other 2 bottom tiers were dummy boards. Dummy or not, each tier was completely covered in edible fondant and edible lace.
The edible lace was made 1 week beforehand to ensure that there were enough (and extra laces!) to cover the cakes:
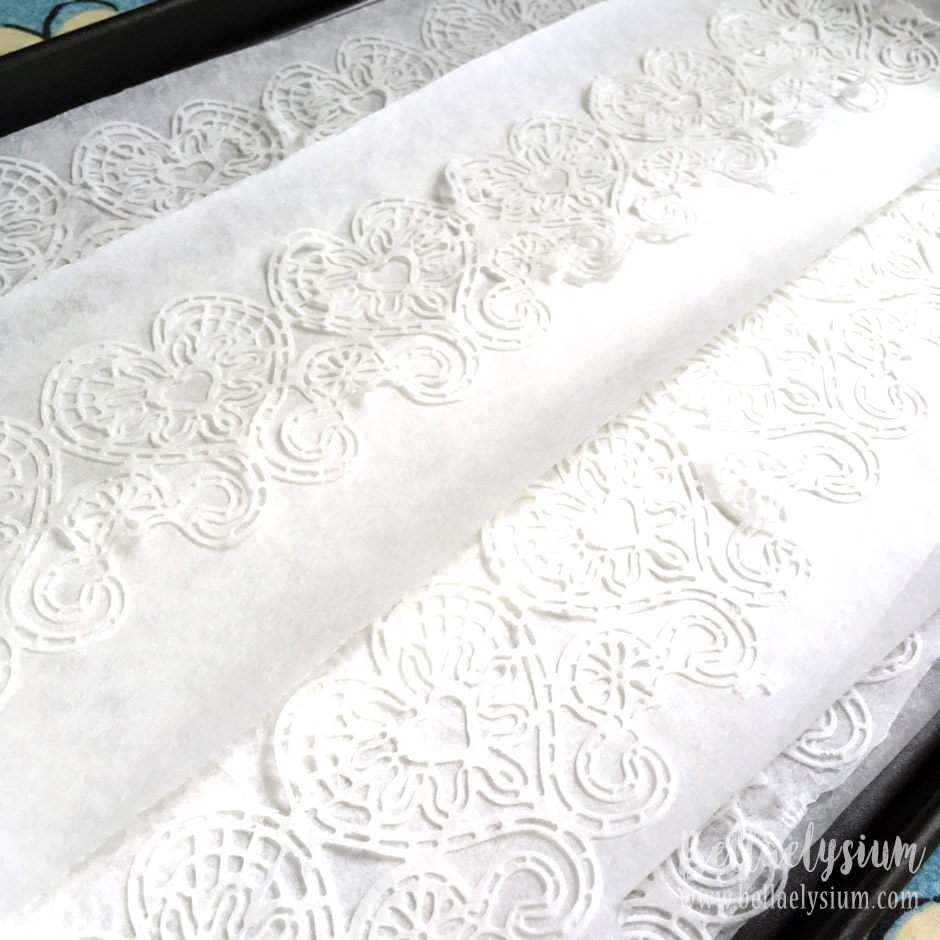
These were painted with silver glitter and lustre paint only 1 hour before applying them on the cake.
The slight wedge was where the couple was supposed to cut the bottom dummy cake. Easy breezy for them.
Covered with fondant and ready for laces.
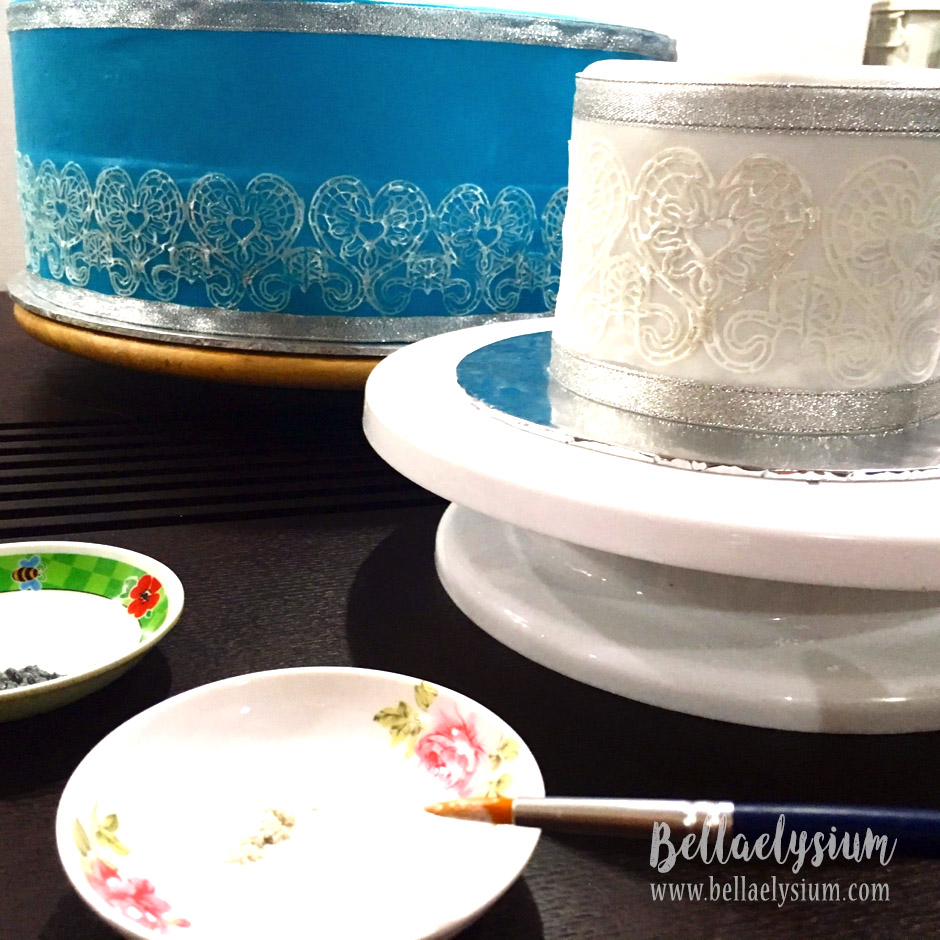
Painted and ready to be dried
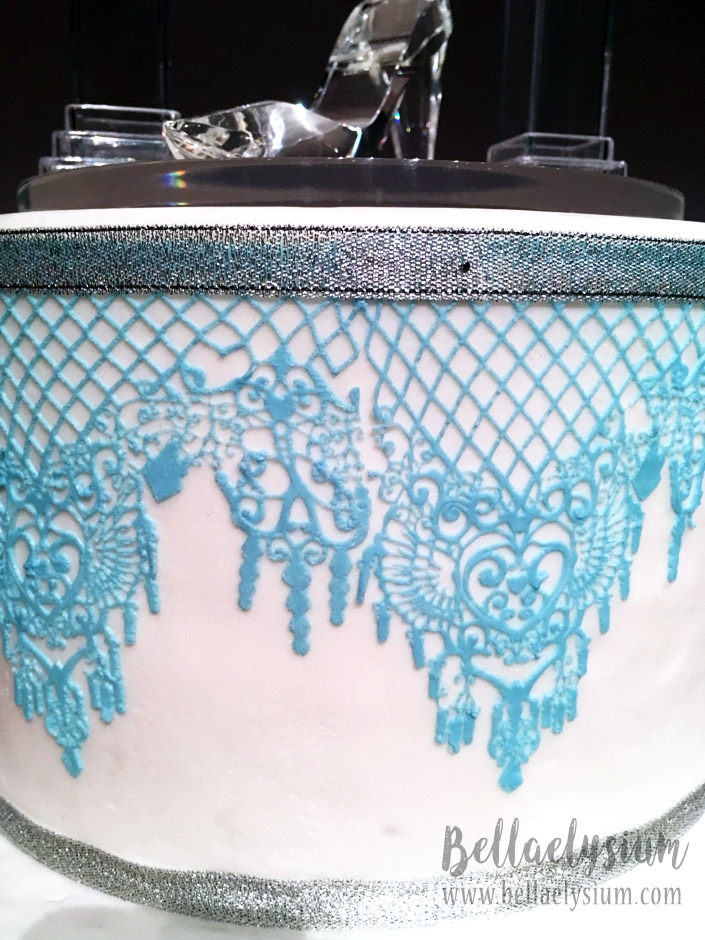
Close up of middle tier
Step 3: Assembling at the Joyden Hall
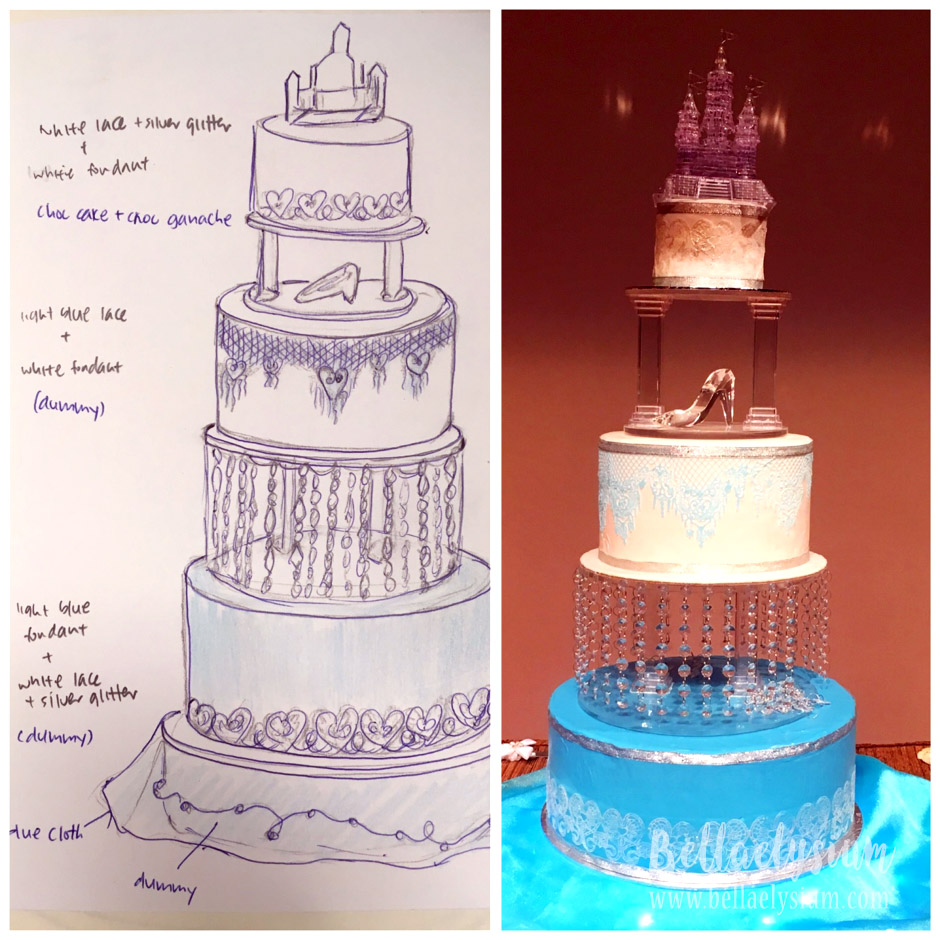
The idea vs the actual cake.
And yes, I’m aware that the cake looked a little bit lopsided. The table provided by the hall was slightly tilted, unfortunately. But, it stood through the ceremony so all went well.
 Congratulations Esther and Lun Siang and thank you for letting DessertiniSG be a part of your wedding <3!
Thanks Dayah for the awesome writeup! My husband and I absolutely love the cake and it was delicious too! I did take a video of the cake cutting right before we ate it. You can view the video at her Facebook page.
Do hop over to her Facebook page to give her some loves and admire her baking creations!
-Esther
NOTE: All photos and contents are credited to Dayah from DessertiniSG unless stated otherwise.
* * *
To view my wedding day post: OUR AD WEDDING DAY + FUN & LAUGHTERS
