Whenever someone requested me to handcraft a wedding gift, I am always excited. That’s means looking through Pinterest for wedding inspirations, deciding the colors to match and putting everything together to bring bright smile to lucky couple who receive it. I love weddings and always do, spending my time sourcing out color inspirations and wedding decor and pinning them onto my board (Bellaelysium Crafts). My wedding is still far ahead, but le bf and I have started discussing what kind of wedding we want, so for now, slowly slowly plan!
Handcrafted gifts always make a wonderful gift and keepsakes as well as a beautiful display to pretty up your own home!
Putting that aside, a friend requested for an explosion box as wedding gift, with Totoro themed in mind. I think he was rather impressed with the Cinderella explosion box I made (which is quite a big hit!), because he requested for the pumpkin cage as well! After which, the colors and layout is all up to me to design. That’s when the planning and brainstorming start! <3
How can you combined a pumpkin cage with Totoro-themed?
I have been cracking my head for days, doodling on my idea book before finally coming up with this idea of making pumpkin cage as a “wedding cage” where Totoro and his other “half” get married inside. Not a good way for me to phrase it but I couldn’t come up with a better way of describing. I know for sure that I wouldn’t be able to find miniature Totoro, so I decided to attempt doing clay sculpting which I have no experience of, but I am so glad that I succeeded making after second attempt, using Darwin Air Dry Clay. Not a very easy clay to work with as compared to polymer clay I think because I have to make sure the clay has smooth finishing and it is simply not easy working with wet clay (for me at least).
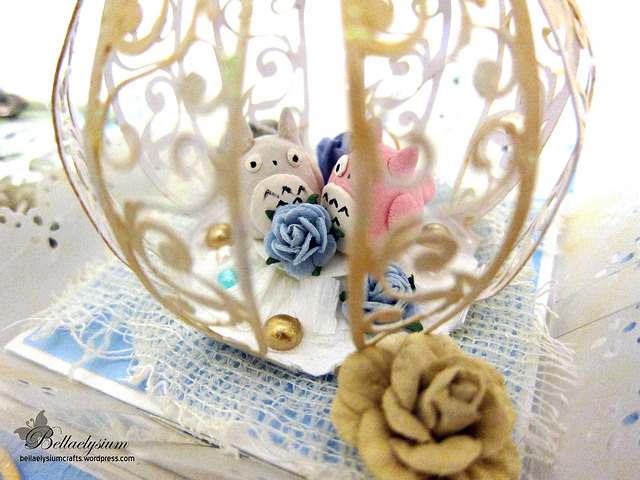
Totoro figurine and “other half” hand sculpted using air dry clay
Next is to work on the color palette that I want to have for the explosion box. COLOURlovers is always my favorite website to create my own color palate!

Combination of blue, gold, white and sea green
I decided on this color combination because these colors hold some special meaning which I want to bring out in my wedding explosion box.
Blue: Fun-loving, fresh and vibrant
Gold: Elegance, luxury, warmth, & tradition.
White: Associated with purity, simplicity & modernity
Green: Means growth, new life, and positive energy
With Totoro-themed in mind, I feel that this color combination will be great, and also, I just love the combination myself! <3
Totoro Themed Explosion Box
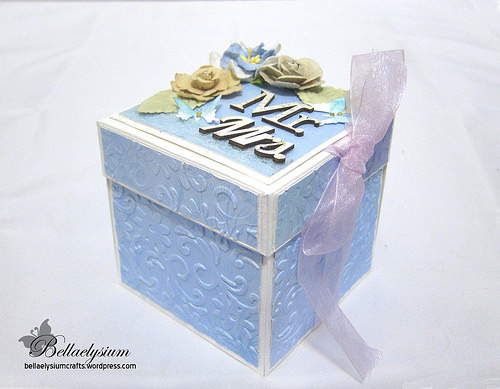
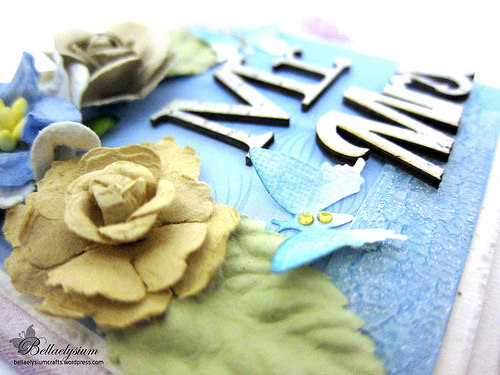
Close up look
I used Kaisercraft Fairytale theme paper as the main background before embossing using Sizzix Texture folder. Prima marketing wood embellishments (Something Blue) “Mr”& “Mrs” were used to add onto the box’s cover as well. After which the Prima Flowers were used to decorate the cover.
Photos don’t do justice because you couldn’t see any shimmery effect nor glitter here but I want to say that the whole card is practically glittering due to the golden border (Spellbinder die cut) of all the squares, which was then glittered on using Tattered Angel Glimmer Glaze.
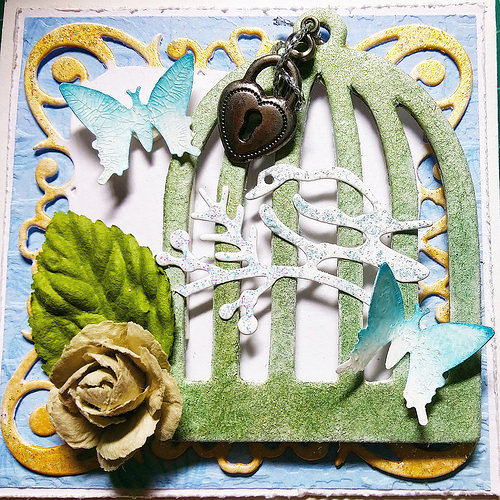
Close up on one of the squares
Maya Road cage chipboard was used for this, which was primed using gesso before using Perfect Pearls (Green Patina) to give a nice greenish shimmer. Metal embellishments (key aand heart lock) tied together with silver string. Butterfly was punched out and distressed using blue chalk ink before using Crackle Medium to introduce a layer of medium over to give a crackled look. Such beautiful look!
I also add the bird and branch which were created using Die-namite die cut, glittered using Baby Blue Sticklers. The final embellishment to give a finishing touch using rose and leaf from Prima Marketing.
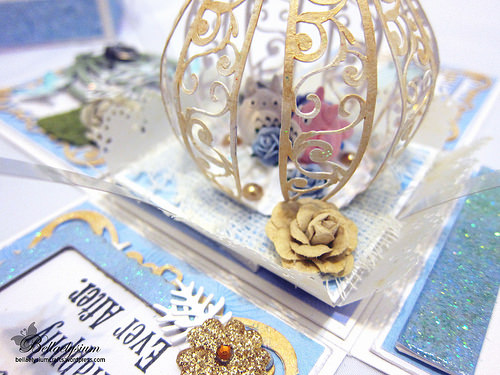
Golden pumpkin cage
The cage is cut out using CAMEO, and each piece of flourish part of cage was prep with gesso before painting gold acrylic paint over it. Tattered Angel Glaze was used to seal it, while adding the glitter as well. And the cage turned out really well, with gold shimmering! The totoro charms were put in the cage, and then decorated with white crepe paper, gold and white pearls to add some elegance and classy to it. I just love how the cage looked!
And of course, you have to add a little personal note too! <3
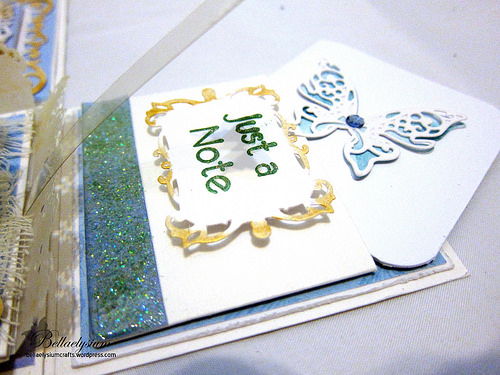
Adding a personal note
I cut out the pocket by measuring and drawing out on 250gsm paper, and the blue border was crafted by adding blue and white glitters, before putting glossy accents over it so it kinds of looks like the glitters were viewed in a lovely “pop” up look. It looks really fairy-like to me so I love it! The border of the frame was painted with gold before adding Diamond Sticklers. Next, a mini card is cut out from paper, butterfly was cut out using Spellbinder die cut before distressing the inside of the butterfly with blue chalk ink…and I add the rhinestone to the center for a finishing touch. The little mini card was done!
The final masterpiece:
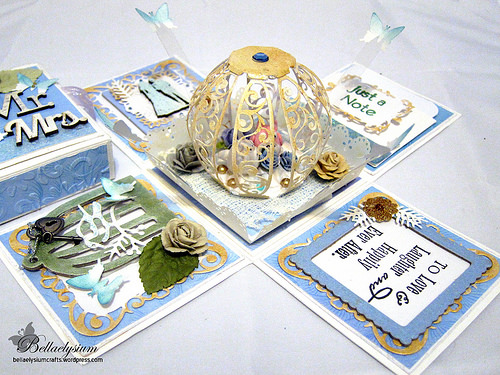
Interior of the card
The other squares were decorated using chipboards, and wood embellishment which I will not go into details since it applied the similar techniques as mentioned earlier 🙂 The finishing touch by adding strips of acetate before pasting little lovely butterflies to create a “fluttering” look when the recipient open the box to give him/her a surprise!
That’s the reason why I just love crafting explosion boxes. It bring out the lovely smile from recipient, and yet, a perfect craftpiece to be displayed at the heart of your own home! <3

7 comments
This is just a beautiful box! You can just see the love and care you put into it! Thanks for joining us at Craft Hoarders Anonymous!
Absolutely gorgeous. Love the surprise on the inside. It’s amazing. Thanks for sharing with us at Craft Hoarders Anon 🙂
This is such an elegant box. I love the color palette, all the wonderful thought you put into creating in…and the whimsical surprise on the inside. Just fabulous! Thanks for sharing with us at Craft Hoarders Anonymous!
What an amazing piece, beautiful work! Thanks for joining us at Craft Hoarders Anonymous!
Just a wonderful box. Very unique and beautiful!
Thank you Debbie 🙂
You are an amazing artist. The fact that you solved this problem and made your own items “to order” is extraordinary! Well done! Thanks for playing along with us at Craft Hoarders!