
Greetings all!
I am back with another explosion box, one of my favourite 3D crafts I love making. Some time back, I made an explosion box on a request and if you have been following my Instagram, you would have watch a short video! Because of Instagram’s video limit, I had to shorten it to 1 minute so do watch the full video at the end of this post!
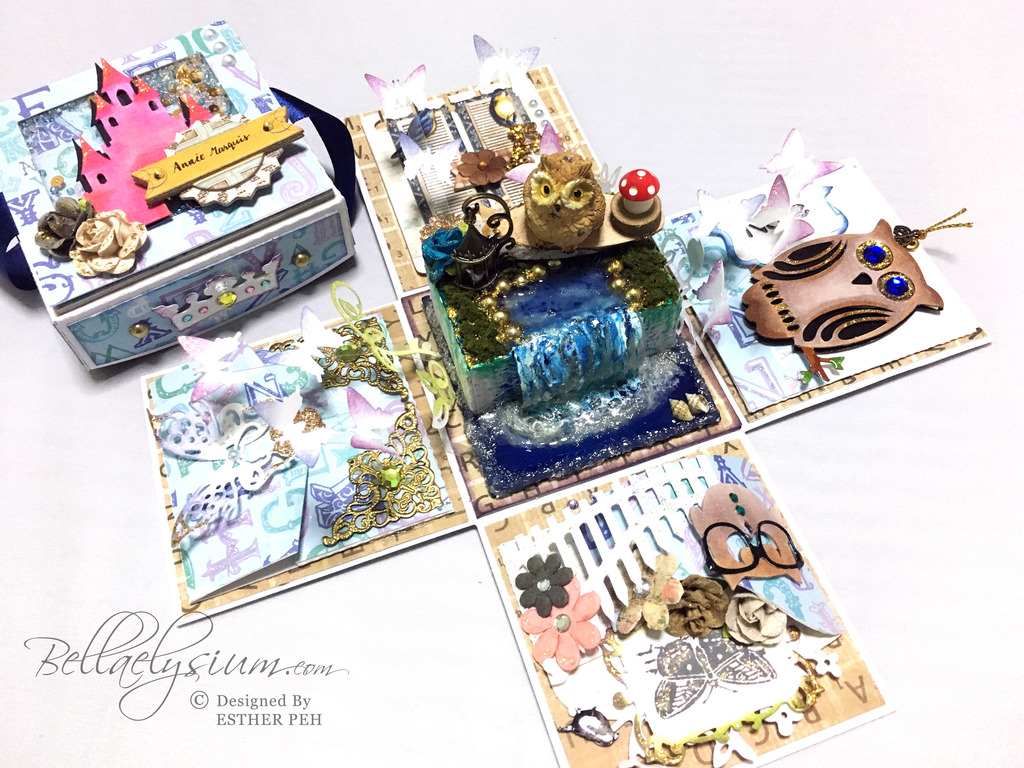
I was requested to make a box for an English/Drama teacher who loves owls, and her students called her, “Her Majesty” for the fun of it and that’s where the idea hit. Why not make a royal themed box, exploded with nature and owls inside? It will be so much like a fairytale, in the castle and you go walking into the enchanted woods.
The idea was agreed on with my client and so here it is:
Into The Enchanted Woods Explosion box

Into the Enchanted Woods Explosion Box
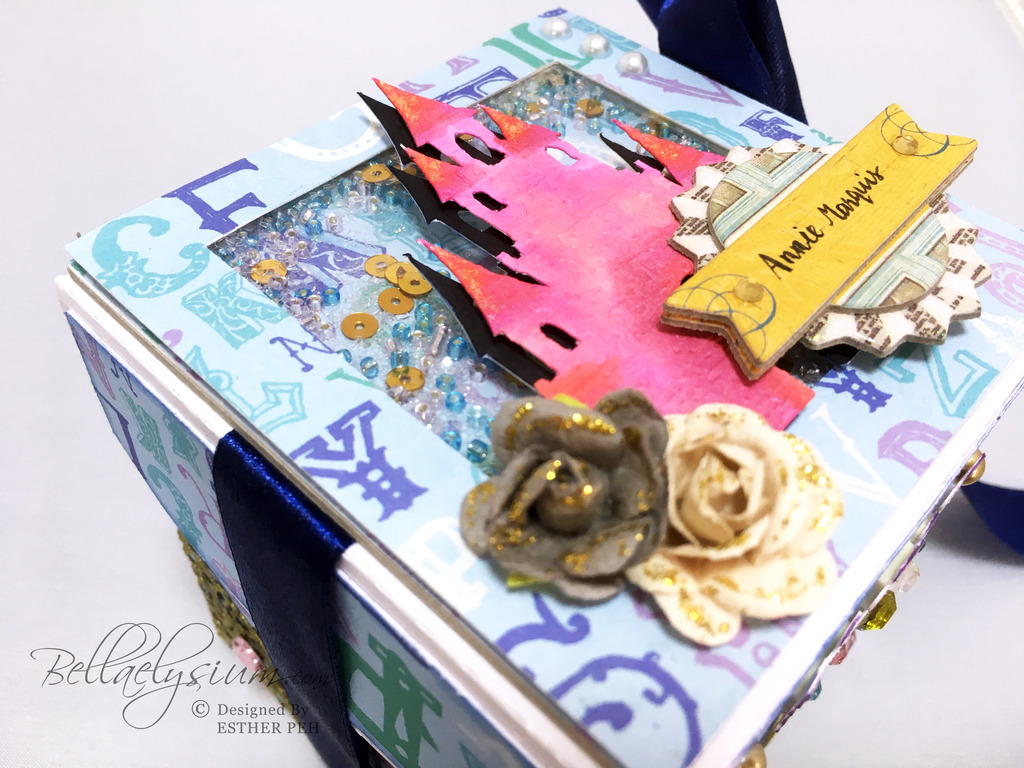
I decided to come up with a shaker card filled with little beads, glitters and sequins for the cover of the box, as it will be pretty interactive and “dramatic”. I also add fabric roses (Prima Marketing) glittered with gold as well as tag where I handwritten the recipient’s name.
Surrounded the box will be made up of patterned paper which is beautifully printed with letters, glittered using diamond glitter Stickler glue. I also painted my dull bronze filigree metal corners with bright gold using Golden Acrylics, before adding finishing touches of rhinestones.
Close up on the shaker inside
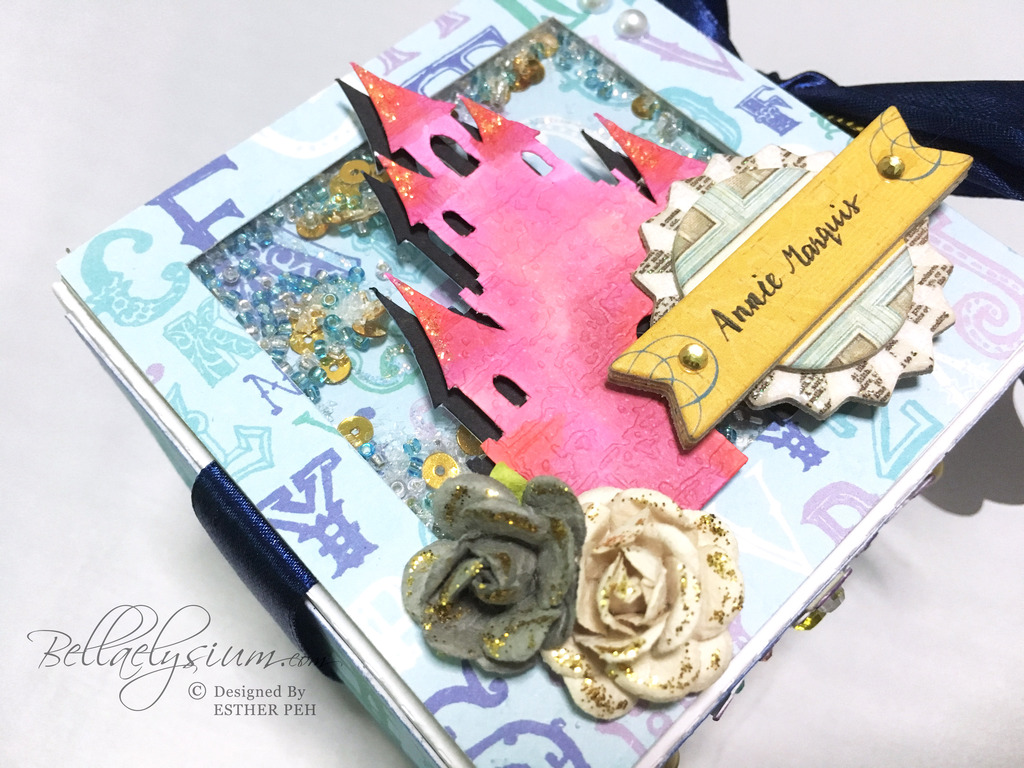
Castle shaker card
I also created and printed out a cut-out tag using Silhouette Cameo and my trusty Canon Pixma printer, labelling it with the recipient’s name and how the students called her too. I think she will find it pretty funny when she sees that, I hope!
I added gold eyelet to allow ribbon to go through for tying purposes, and behind the tag was actually cut out feather-shape paper but unfortunately, it was not fully captured in the picture below.

Adding gold eyelet
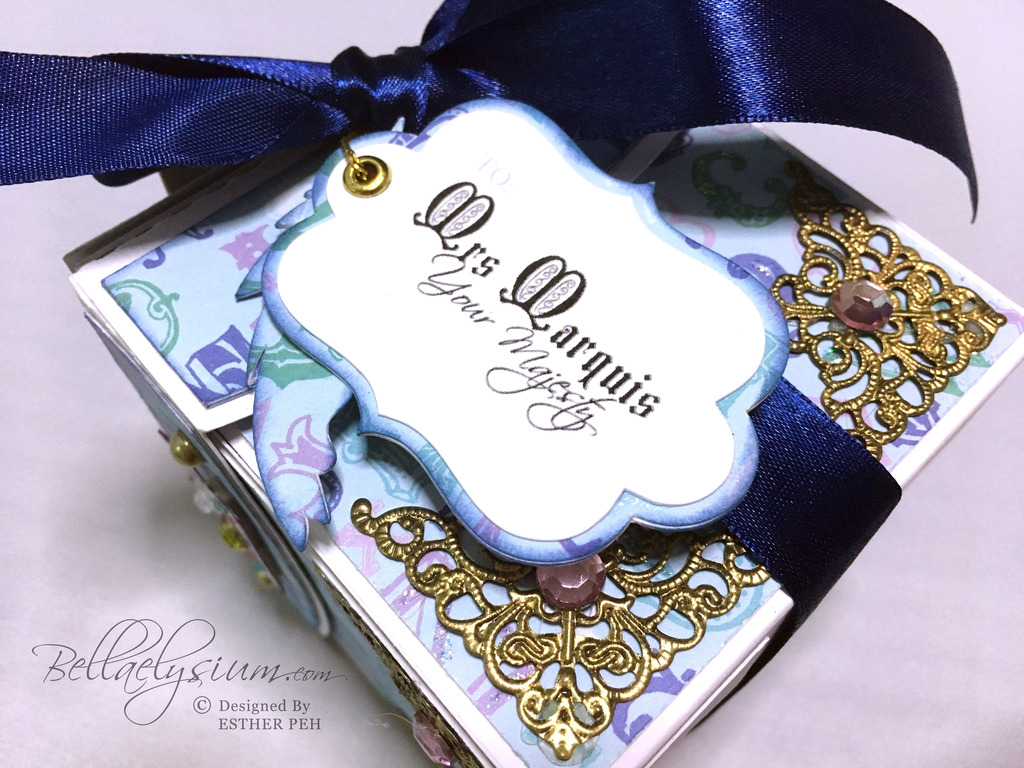
Tag which stated “Mrs Marquis, Your Majesty”
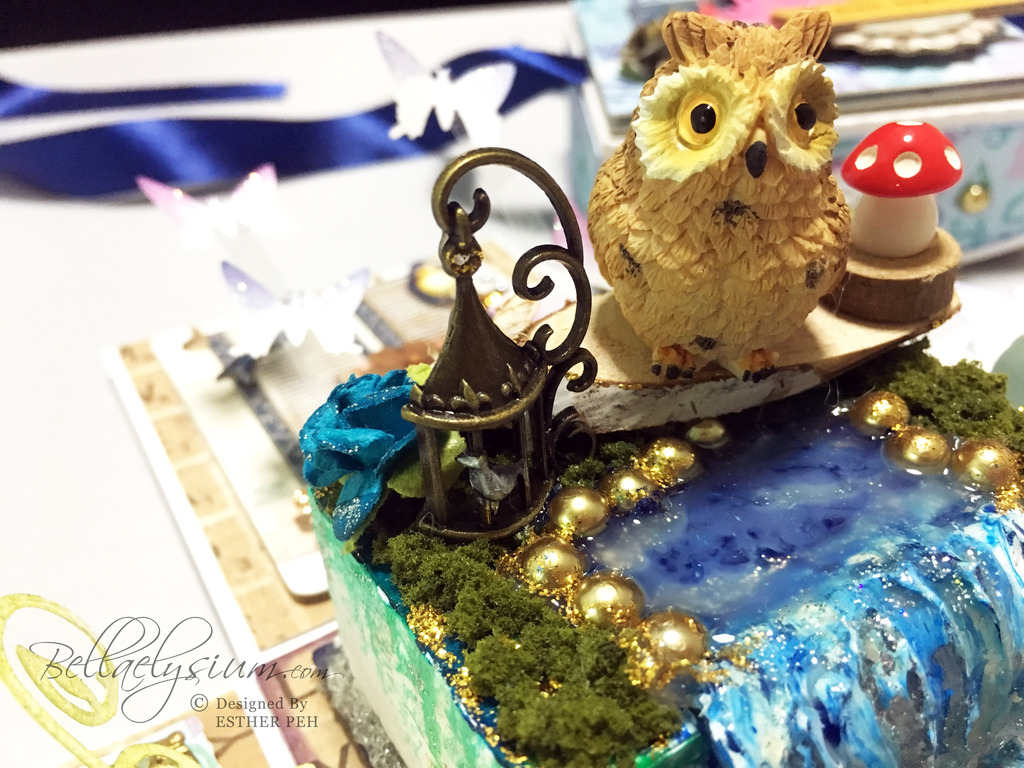
Opening the box and looking inside, it will be exploded with butterflies! Located in the center of the box is the main highlight, where it was a tiny little island with enchanted waterfall. Perched on top is the owl figurine, clearly looking out and it rested there.
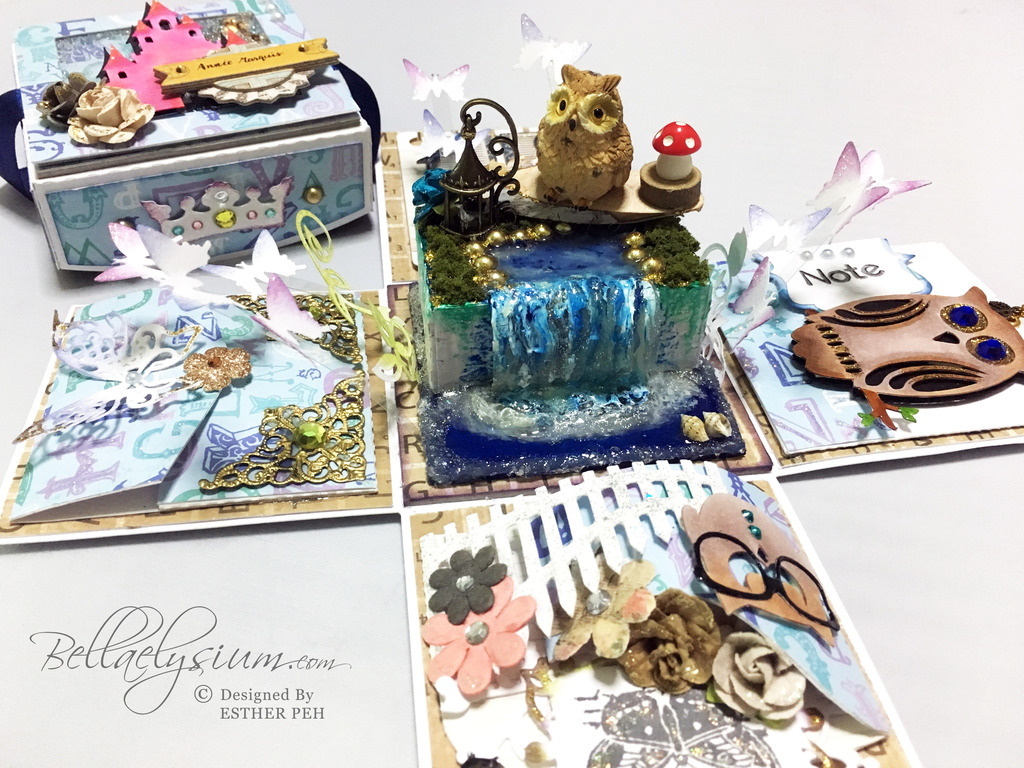
Opening to an explosion of butterflies
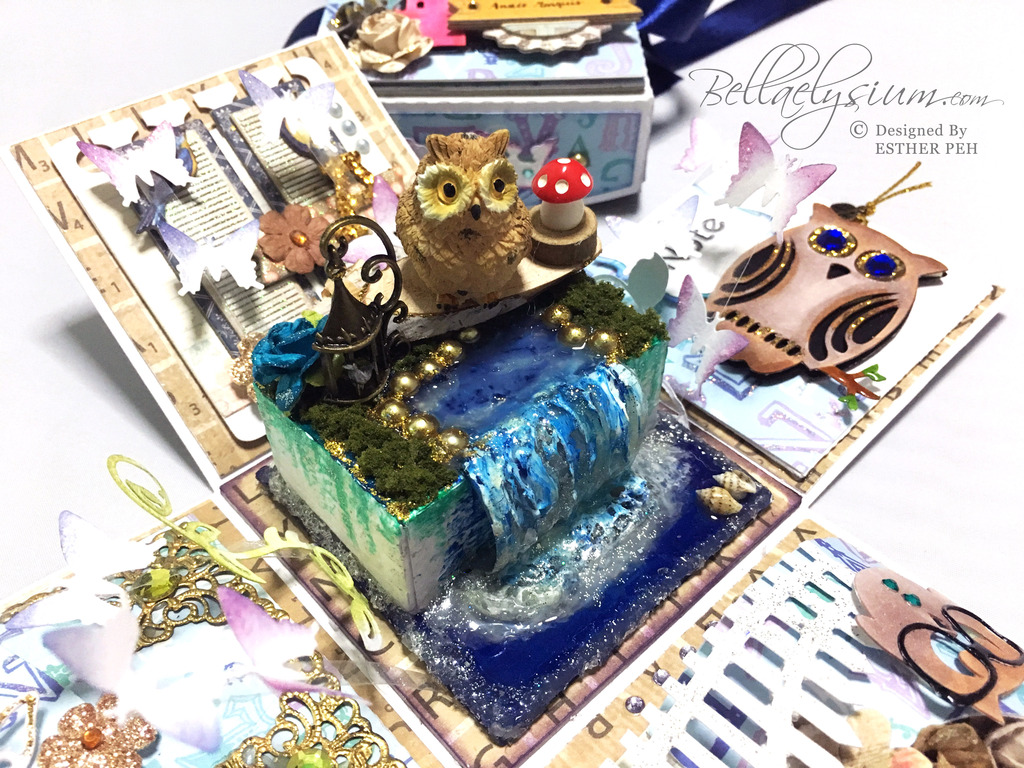
On a closer look
Near by, a small little cage of bird which I painted it with Golden Acrylic silver before adding a slight glitter at the top of the cage. Then I added a tiny fabric blue rose behind, glittered as well. The bushy little patches of green to create landscaping, was done using bits of green from Woodland Scenics.
Tiny little bird in cage
Zooming into the main highlight of the box – the center! I have to admit that this masterpiece of mine took me nearly 2 days to complete due to the long drying time for the “pond” to set in and the paint and glue to dry!
Here’s a peek into my work-in-progress videos from my Instagram, if you miss it out on my Instagram:
On a closer look, I tried making waterall for the first time, and it works using tremendous amount of patience and perseverance! I made it by melting glue stick and shaping it to form a waterfall before painting it with acrylic paints to make it looked more realistic. I also add some “realistic water” from Woodland Scenics, glossy accent glue, glitters, nail varnish as well as paint to make it even more realistic where one can see “water” flowing down to the water below.
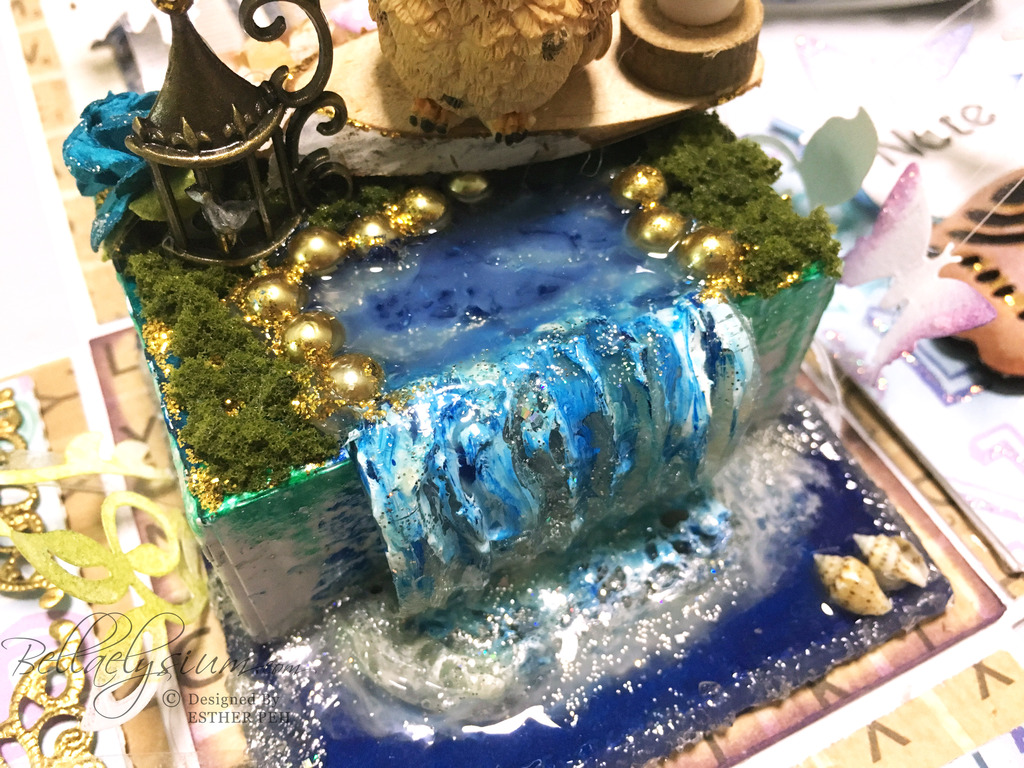
Close up look on the waterfall and the tiny little ripples – spot the mini shells!
Moving on to the surroundings, I actually decorated the base with patterned paper which comprised of Scrabble, a known board game of letters. I think it suits the English teacher perfectly.
First focus is the owl with its spectacles, looking quite studious indeed. I cut out the spectacles and make it glossy using Glossy Accent from Ranger, cut out owl was colored using copic sketch markers before giving him a tiny little 3D garden home which was filled with flowers and die cuts decorated with glitters and gold paints. A nice hint of classiness!
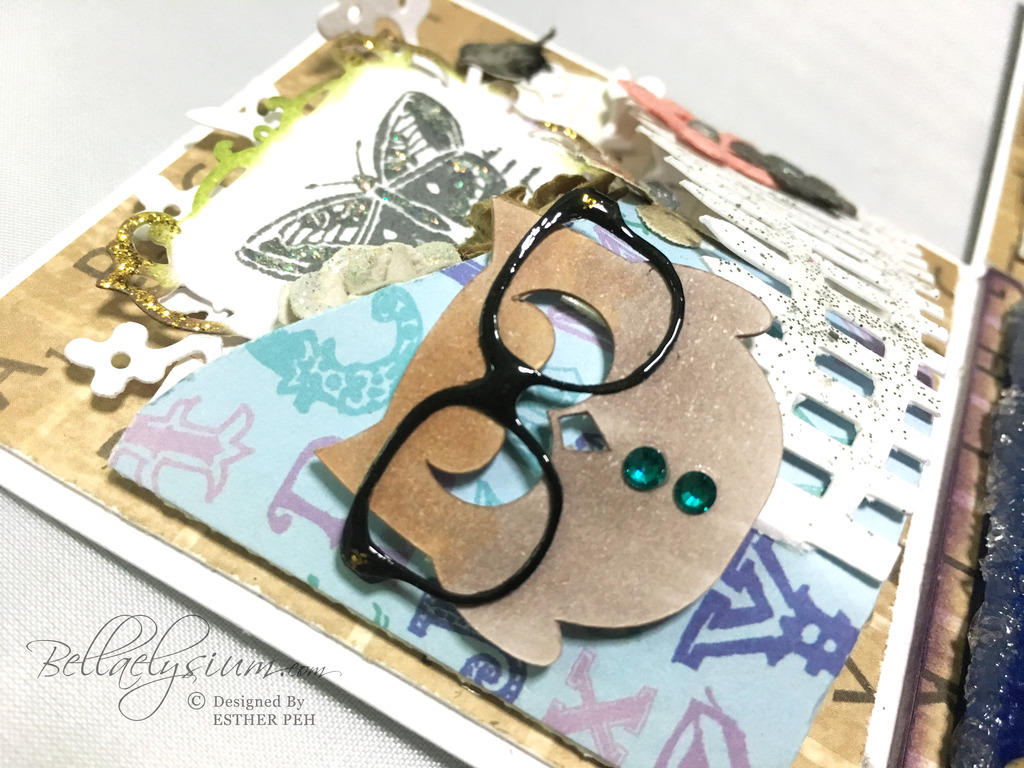
Studious owl perched onto the fence of the garden
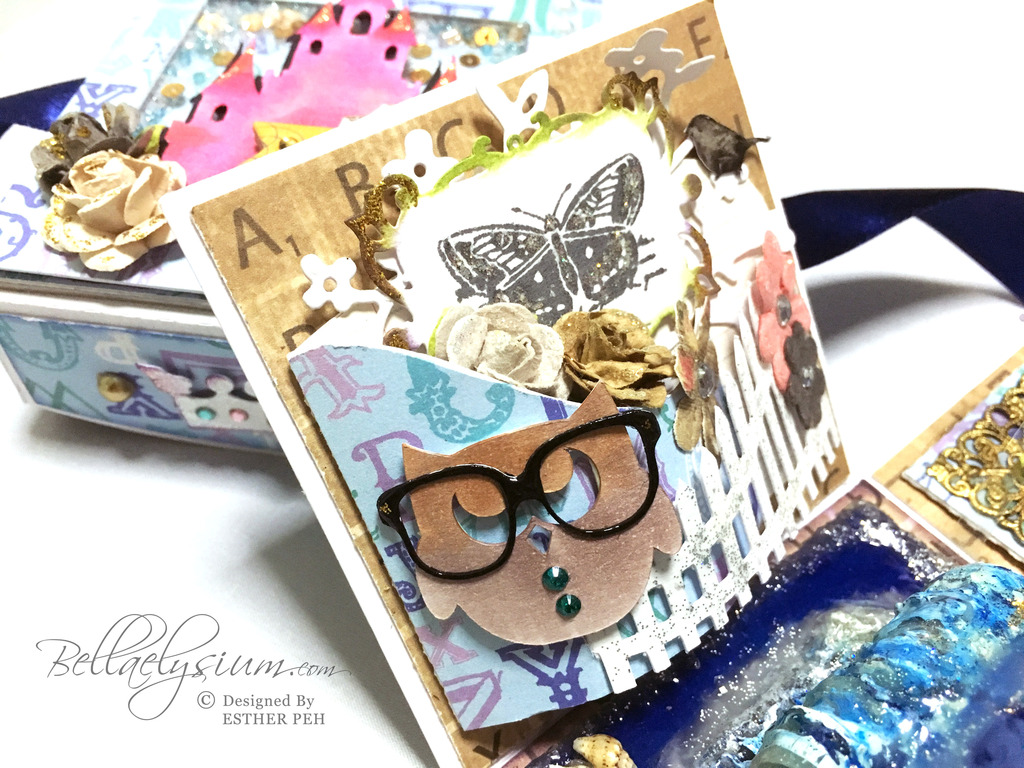
3D garden filled with fabric flowers and branches die cuts
Next focus will be the “notepad” that I cut out, embellished with windows which was from Bo Bunny, and I added the recipient’s initial which is “A” in gold glitter, finished up with a couple of gold glittered flowers. I add blue pearls at the side for a nice classy look.
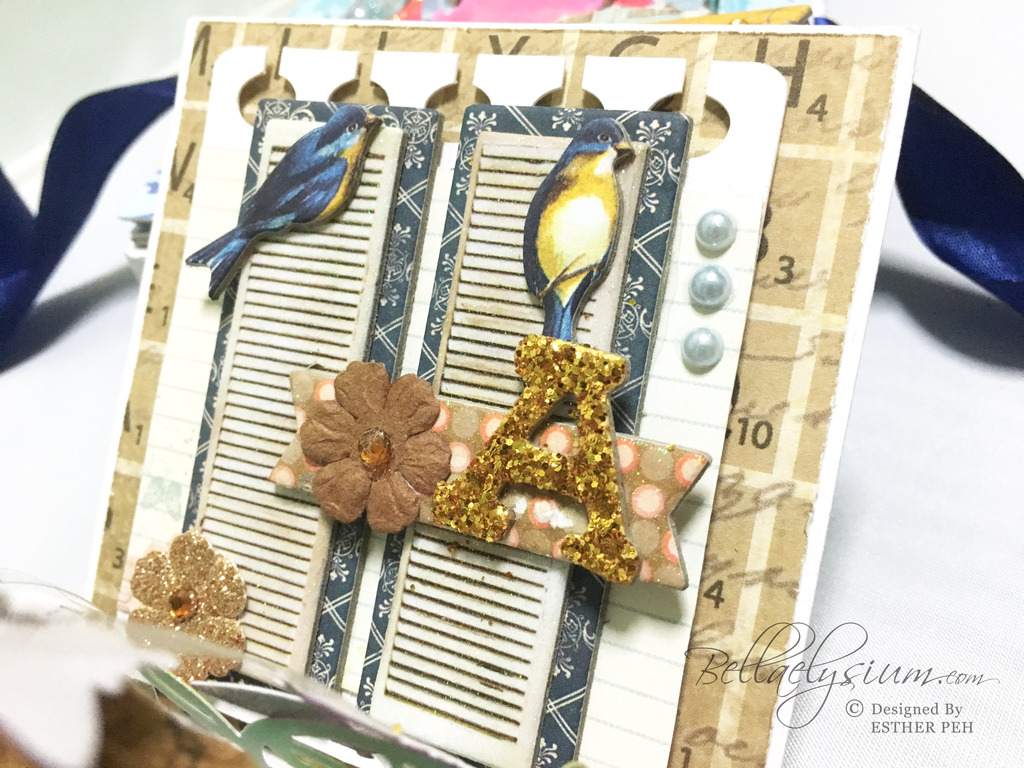
Window with golden A embellishment
Moving on, this is one of my favorite because I was trying to experiment making pocket flap using magnet, which is neat and yet invisible. Thankfully, it worked really well!
I embellished the pocket card with butterfly die cut using Spellbinders template and my big shot machine, followed by a hint of gold paint and glitter. Then I add a nice gold, glittered flower at the flap. All ready for inserting photos which I printed out using Canon Pixma printer on glossy photo paper.

Embellished pocket card for photos
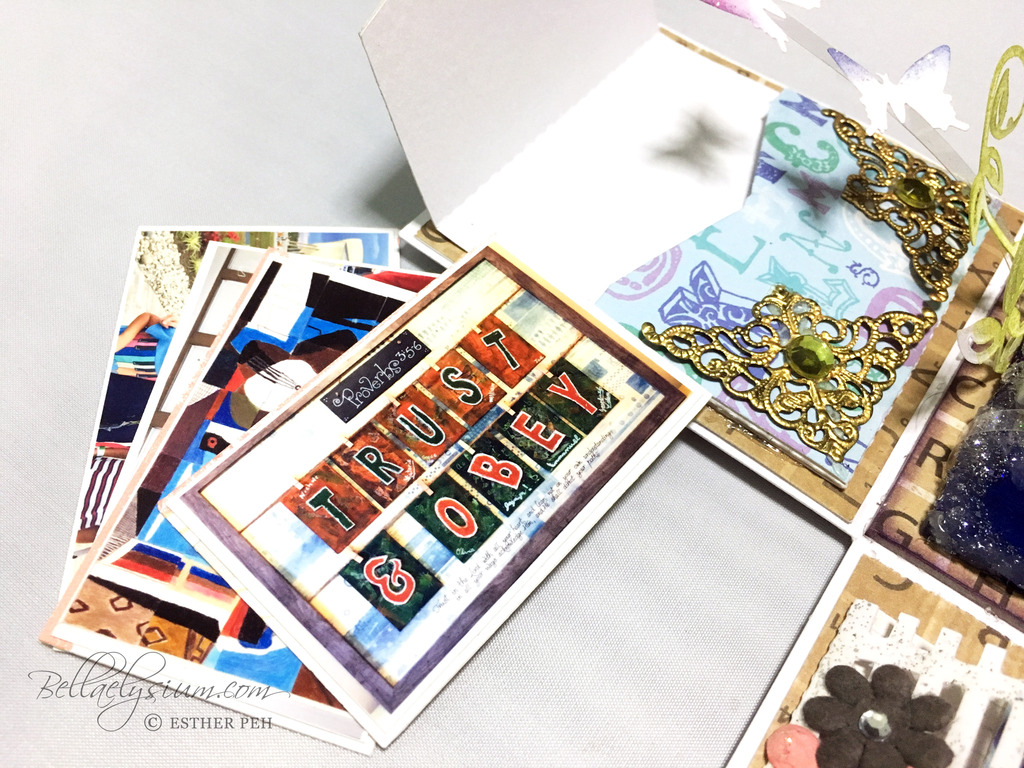
Inserting mini photos into the pocket
Now the last one is the pocket note for a short handwritten note. I added a pull out note, pulling out by the gold string that was tied to the gold eyelet. I also added a tiny leaf charm to it. I cut out the owl using CAMEO, and then colored it using copic sketch markers and finally, adding rhinestones to the eyes to create a bit of “mystery” air to it. Well, I hope it does look mysterious enough!
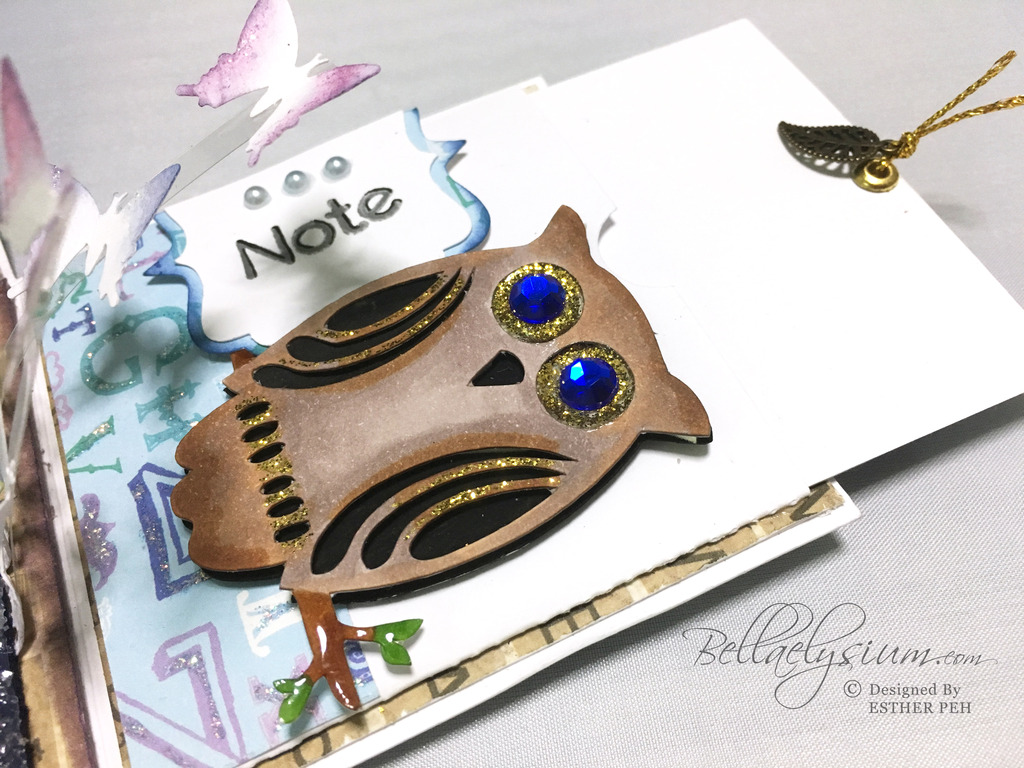
Pull out note with pocket

Behind the note is patterned paper with glitter – a lovely backing.
The final outcome:
Into The Enchanted Woods explosion box
Here’s a full video showing how it looks like:
Much thanks to my husband for helping to film this!
I hope this will serves as an inspiration to 3D crafters out there. Thanks for dropping by!
Here’s some of my favorite explosion box past creations:
Cinderella Explosion Box
Mathematics Explosion Box
Totoro Wedding Explosion Box
Beauty and the Beast Explosion Box
